Pick your printer
Label Station uses the label printer that is already installed on your computer. You choose it once in the Setup tab.
Before you start
Section titled “Before you start”- Your printer is installed in Windows or on the Mac, switched on, plugged in, and able to print from another program.
- Labels are loaded in the printer.
Choose the printer
Section titled “Choose the printer”-
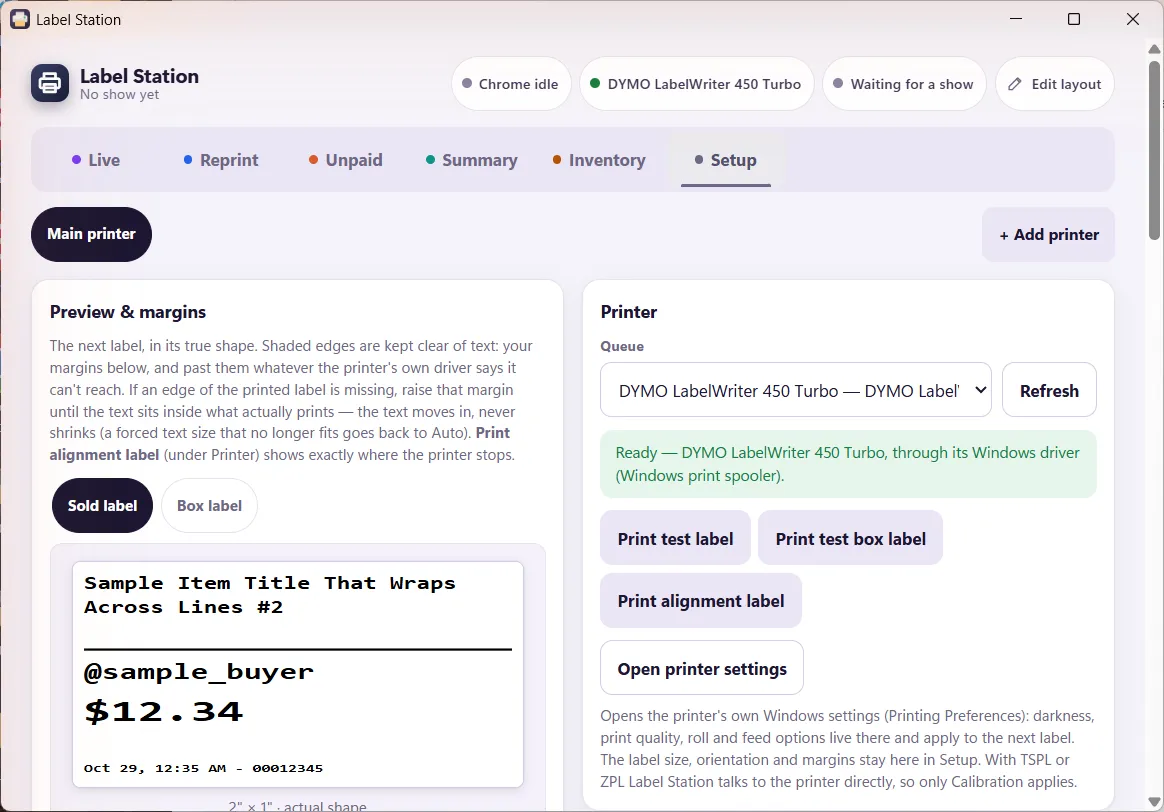
In the Label Station window, click the Setup tab.
-
In the Printer card on the right, open the Queue list and choose your label printer. If it is not listed, make sure it is on and plugged in, then click Refresh.
-
Read the line under the list.
- Green means ready. Go to the next step.
- Red means something to fix, and the line says what. The most common one is a DYMO or Brother QL printer that needs Printer language set to Windows driver (on a Mac, Mac driver). Scroll down to the Calibration card, change Printer language there, and the line turns green.
-
Click Print test label. A sample label prints.
-
Scroll down to Label size and check the width and height match the labels in your printer. The preview on the left is the true shape of the next label.
If something looks different
Section titled “If something looks different”- The sample label prints as a page of plain text. The printer language is wrong. See Printers and printer languages.
- The text sits too far up, down or to one side, or an edge is cut off. Add a margin on that edge. See Label size, margins and test labels.
- The printer is not in the list, even after Refresh. See Labels are not printing.
Where to next
Section titled “Where to next”Still stuck, or is something on this page wrong? Get in touch and Andy will sort it out. Label Station is made by Mood Swings Design. Not affiliated with or endorsed by Whatnot.